
How to Make Organization Your Jam
Have you ever felt so overwhelmed by everything on your to-do list that you don’t even know where to start? I absolutely hate that feeling but it happens to all of us. The beginning of the year is especially stressful as we are setting up our classroom, learning new curriculum, writing lesson plans, preparing to meet a new group of students, and balancing our personal lives too.
I am a lover of teaching and a lover of all things organizational so when you blend the two together, you will find I am a very organized teacher (most of the time at least). Being organized helps me feel prepared and stay sane during a hectic school day. I will be sharing tips that work for me and my classroom. Hopefully, you can incorporate some of these tips into your current organizational system.
Organizational Tips
- Declutter
- Binder system & electronic system
- Be flexible
- Label, label, label
- Everything has a place
Declutter
I don’t do well with clutter; it stresses me out and gives me anxiety. My motto is if you haven’t used it in a few years, let it go! I realize that this can be hard as I always question whether I might need something in the future. The reality is if you haven’t used a resource recently, you probably won’t need it in the future! I am constantly getting rid of things I do not have a need for anymore, whether that is donating or passing the resources along to another teacher. The first step to organizing is going through your belongings and determining what you use on a regular basis and what you do not use/need. Then ask yourself if there is a better way of organizing these resources, materials, etc. Dollar Tree bins are perfect for storage!
Binder System & Electronic System
Call me crazy but I like having a hard copy and a digital copy of everything. So, my curriculum is organized into binders (using sheet protectors) by unit but I also have digital folders on my laptop that are organized similarly. Hard copies allow me to quickly retrieve and make copies while digital copies allow me to share with my students (we use Canvas). There’s just something about having both that makes me happy.
In addition, I love having a teacher binder to store important information (class lists, usernames and passwords, parent communication log, etc). A teacher binder also enables substitutes to have access to everything they may need to know in one spot. Grab the Editable Teacher Binder.
Use a Planner
Using a planner helps me know what is going on and when. Without my planner, I would be lost. My planner includes brief plans for each day, school events, personal events and appointments, and due dates. I personally prefer a paper planner but also have a digital planner that I purchased from @helloteacherlady, so I can view my plans, special events, etc. from anywhere. I plan week by week but with the end in sight. I am familiar with my curriculum and standards and have created curriculum maps that outline a suggested time frame.
If you are newer to your curriculum, this will be a difficult but doable task. I typically allow at least two days per lesson (keep in mind I have 44 minute class periods). Some lessons take longer than two days and some take less so in the long run, it usually balances out. I know some people enjoy planning for the entire year, but I cannot anticipate how long it will take my new batch of sixth graders to master particular content and skills.
Be Flexible
This can be hard for teachers, me in particular. We are under a lot of stress to get through our curriculum, but we must be flexible. Sometimes you have a fire drill and don’t get to finish a lesson. Sometimes you have a pep rally that dismisses class ten minutes early. Sometimes your students are mastering a concept quickly and sometimes they are completely struggling. Being flexible means rolling with the punches, and this is another reason why I only plan week by week. Leaving some wiggle room for unexpected events in your plans alleviates stress when they do occur.
Label, Label, Label
Everything in my classroom has a label. I share my classroom with my students and I want them to respect the hard work I have put into creating a safe, warm, and inviting space. Labels are used to remind my students where materials and supplies are housed. Labels are also used to help me find resources quickly. Curriculum unit binders, teacher resources, and student resources are color-coded and labeled. Labels are also helpful for substitutes to be able to locate materials when you are out. Label all the things to make your life easier!
Everything Has a Place
Everything has a place in my classroom, just like at my house. I would recommend having designated locations in your room for the following things: student supplies, hand-outs, turning in work, returning work, filing/grading/copying, no name work, absent work, and items that get left behind by students. Side note: Some of these labels can be found in my Free Resource Library located here.
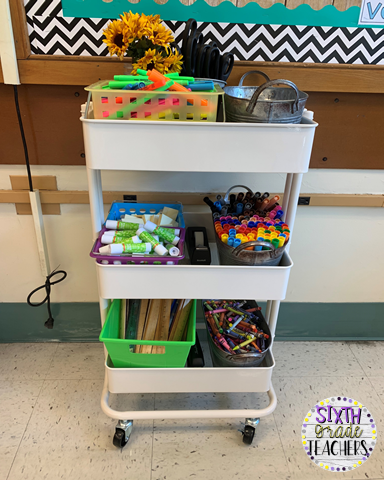
Student Supplies
Student supplies are located on my cart from Michaels. Each table group has a caddy that they can use to retrieve and store supplies in for that lesson. Then, all supplies get returned to the cart at the end of class. Students know that they should not be using supplies from my desk since the cart is for their use only.
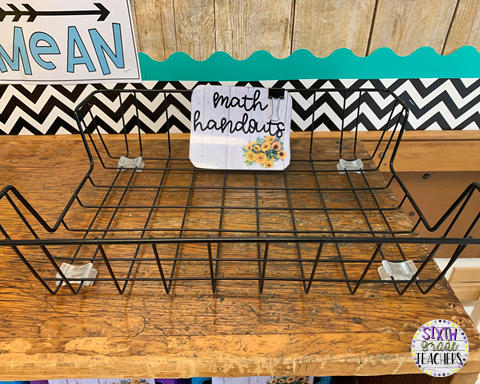
Hand-Outs
I have two wire baskets I use for hand-outs; one for ELA and one for math. Both are located on my back shelf and this makes it super easy for students to grab a hand-out when the opening procedure directs them to do so.
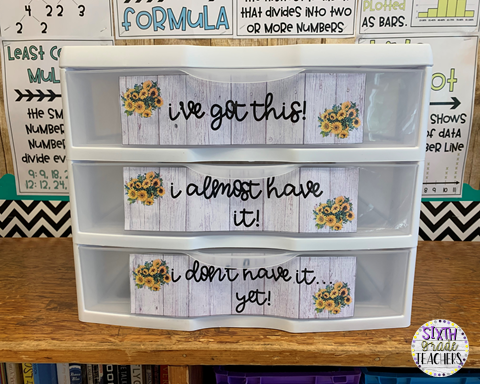
Turning In Work
I have a plastic three-tier drawer from Amazon that I use as my turn-in bin. Students self-assess their learning and progress and use that gauge to turn in their work to the appropriate drawer. Drawers are labeled: I’ve got this, I almost have it, and I don’t have it yet.
Returning Work
Once work is graded, I place it in a wire basket that is labeled by the class period. When the bin is full, it is a great reminder that I need to pass back work!

Filing/Grading/Copying
I have another three-tier drawer from Amazon that I use for my teacher needs; filing, grading, copying, and important information for subs/emergency procedures. The school day can get a little crazy so I place materials into my drawers and deal with them later. Usually, at the end of the day, I will go through the drawers and file resources where they belong, grade papers, and make copies.

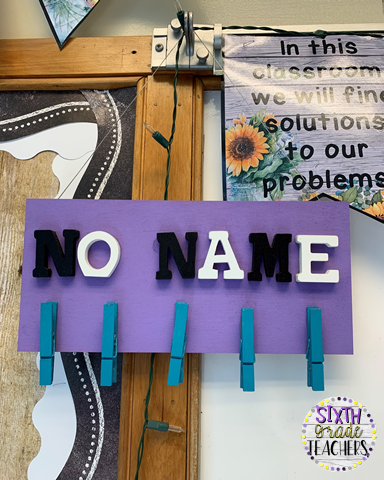
No Name Work
Let’s face it; no matter how many times we remind students to put their names on papers, there is always a nonamer. My co-teacher made this no-name work sign for me years ago, so I hang it up and remind my students that if they didn’t get a grade, they probably want to check the no-name sign.
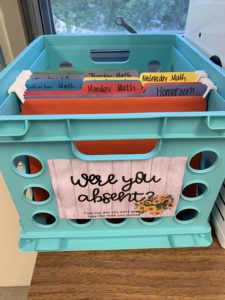
Absent Work
To prevent students from coming to class and immediately asking what they missed when they were absent, I created an absent work bin. I use a crate from Walmart with hanging file folders that are grouped by day and subject. Students know to check the bin for paperwork and then check in with me. The bin is definitely a time saver!
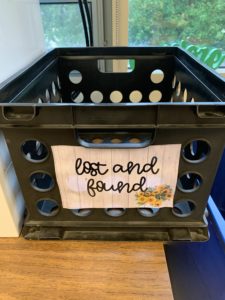
Lost and Found
You would be surprised by how much middle schoolers leave behind when they exit the classroom. I have had students leave gym clothes, sneakers, water bottles, glasses, sweatshirts, graphing calculators, books, etc. I use a crate from Walmart that is labeled Lost and Found. I train my students that anytime they see something on their desk/seat that is not theirs, don’t ask me; just put it in the lost and found. About once a week or every two weeks, I will send a student to take my classes lost and found to the school’s lost and found.
Concluding Thoughts
At the end of each school day, I prepare for the next day. I will prep and set out any resources I need. I also clear off my desk and ensure that everything is in the spot it belongs. It takes a little bit of work but the next day I am always so thankful to arrive to a clean desk and materials prepped for that day’s lesson. I hope you find these organizational tips helpful. Comment below with your favorite organizational tip!

